"Big Foot 43"
or
Wheel exchange incl. tire
exchange
Important notice: The following
explanations only show my trial for an emergency with no external help. What I
have done can cause serious damage and cause danger! I rufe ANY liability in
case someone wants to test it as well and damages anything or even worse causes
injuries for himself or other people!
While preparing Big Foot
fort he paint-job I took off as well the wheels, because I wanted to paint the
bodies of axle as well. Furthermore the rims had only a priming, but I had on
the other hand still another set of rims, which were already in silver – exactly
as I wanted the first ones to be finally.
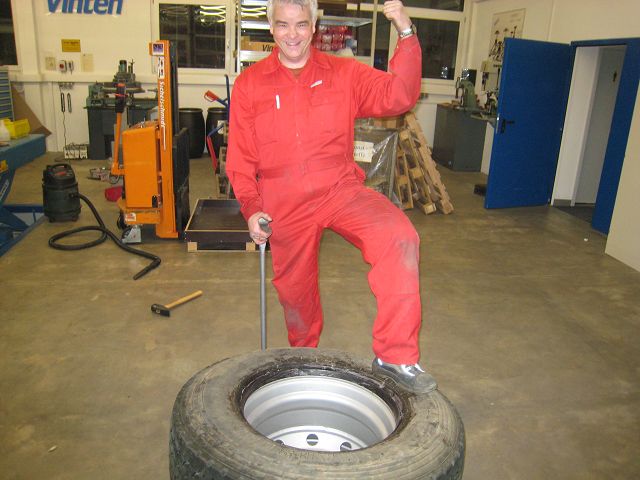
Therefore I had decided
to dismantle the wheels and change the tyres, so that I could paint the rims
better. At the same time I wanted to practice the wheel change and to find which
extra tools I still need for that job in the tubeless wheels, in order to be
able to do this also a case of emergency and being alone.
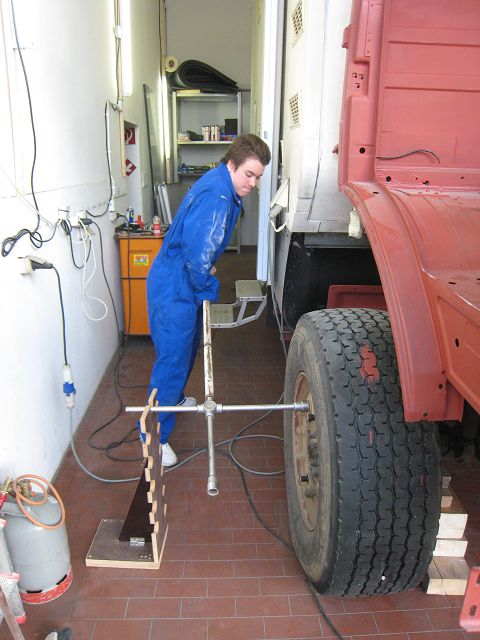
First job was to
dismantle the wheels where my son helped me but even with the help-tool (pls.
refer as we well to here) and extension on the wheel cross he lacked some
kilograms to loosen some of the nuts, which I had tightened before 2 years
with 650Nm - some stuck extremely.
Dismanteling:
For absolute beginners: Loosen the nuts whilst the wheel is on the ground and
brake applied and wheels are secured. Once the nuts have been loosened by half a
turn, lift up the wheel with the jack and loosen them all completely. Take off
the wheel, this can be tricky but if you use the wheel cross with two entensions
under the wheel and lift it up on the other two you can pul on the top of the
wheel and bit by bit pull it off.
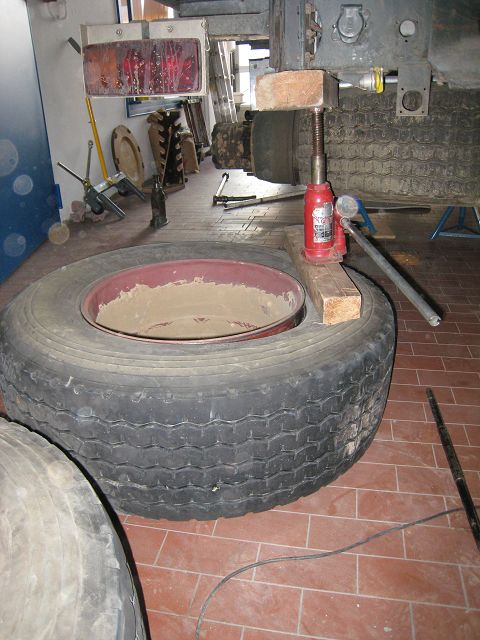
After the wheels were
dismantled, the tyres had to get off. So the valves were removed and with the
hydro-jack the tyres were pushed off the rims by using the truck frame as the
counter force.
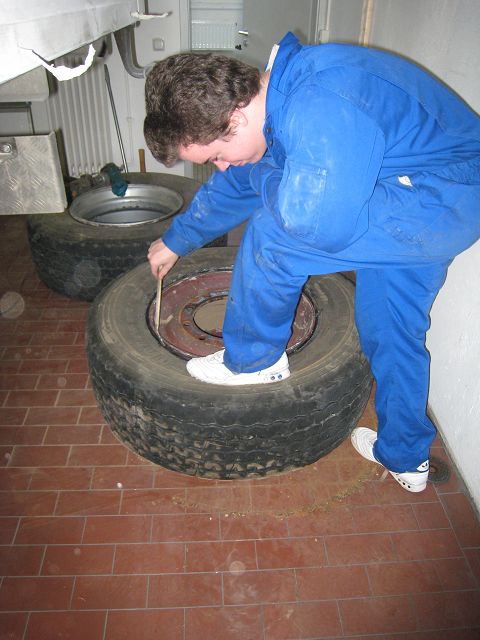
After I had dreadfully
struggled myself with the first wheel, I had bought the installing paste (kind
of soap), which you can get for little money e.g. in 10 kg of buckets at any the
good truck and/or car parts dealer. Here you see my son well lubricating full of
enthusiasm the wheel rims and the bulges of the tires.
Here the tools, two
"small" assembly levers with 65 cm, lying on the wheel and - bought because of
despair (see above.) – this nice lever with more than 1 meter length.
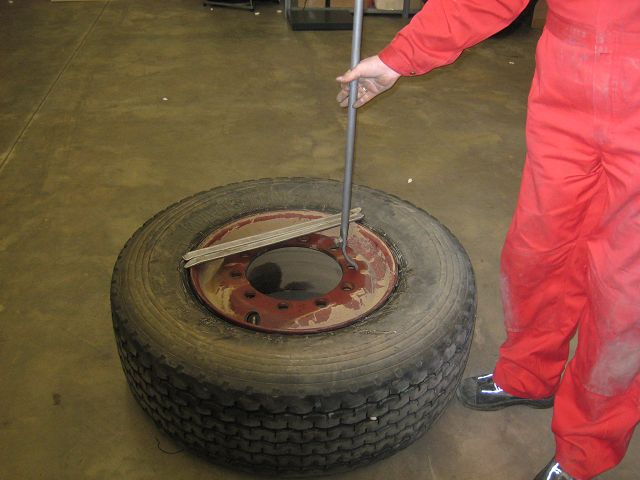
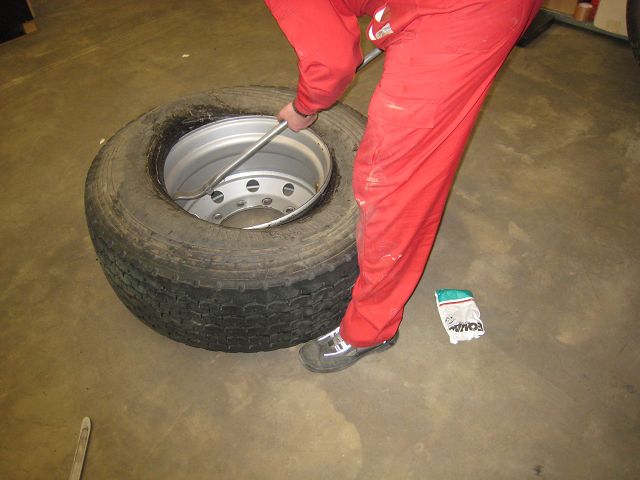
While you squeeze down
the tyre on one side so that it nests into the recess you push the lever
between rim and tyre and lift the bulge over the rim.

Now you put the second
lever into the created gap.
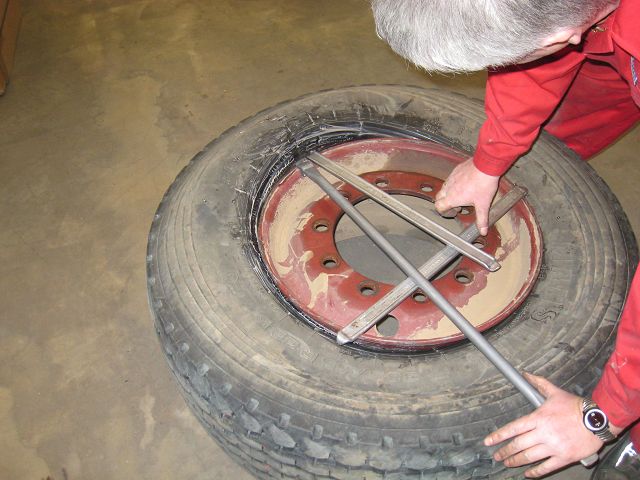
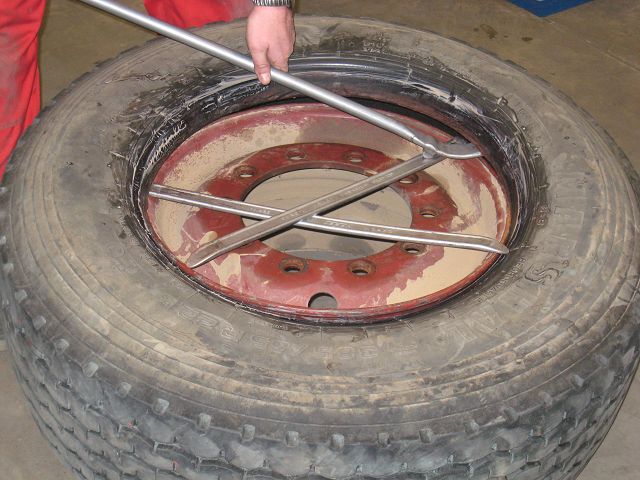
At both ends of the long
lever are two round bars welded. Either you can put this part on the inner edge
of the rim and lift the bulge further over the rim ...

... or you puts it on
the short assembly levers. I prefer the last option, because it does not scratch
the paint of the rim.
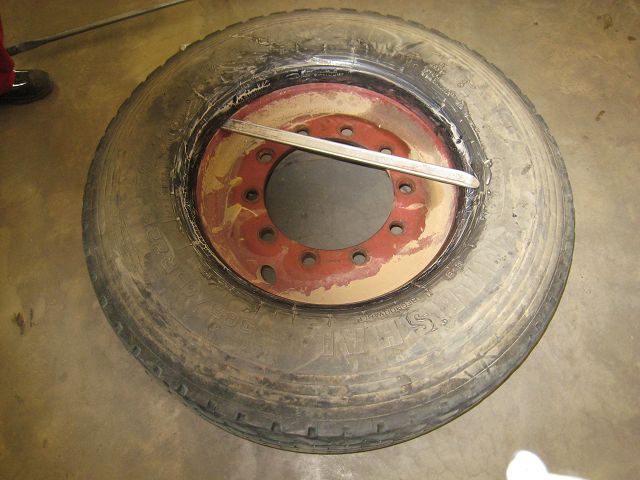
So, that’s it,
nevertheless I must say after 4 wheels that the now following part is harder.
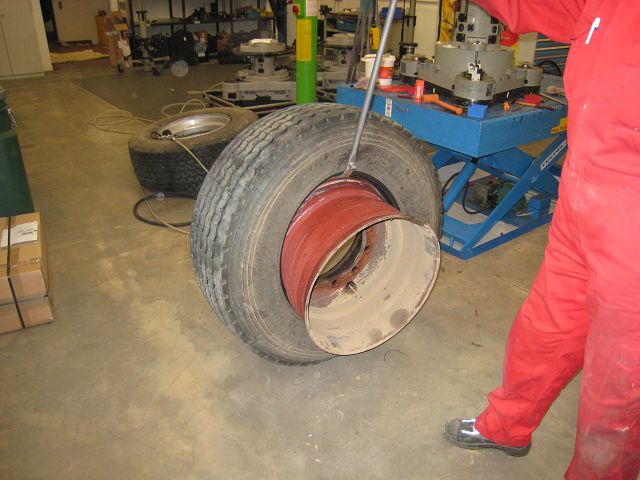
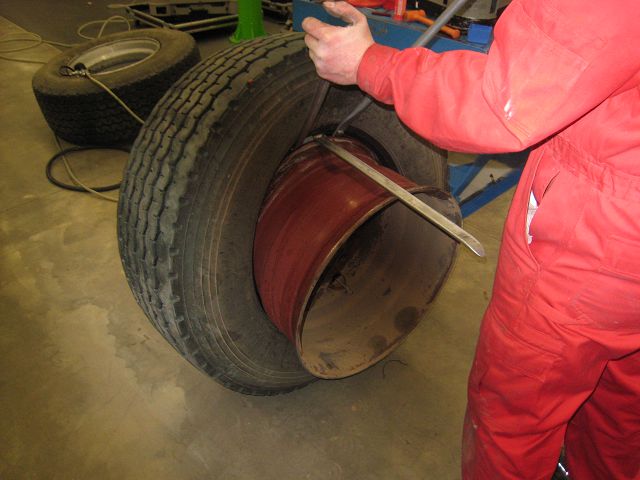
I
I set the wheel upright
for the second part and pushed the rim through. It is important always to have
the part of the rim with the recess near the bulge which you want to dismantle!
Now push in the assembly lever and lift again.
Now you can use two
additional short assembly levers. On one side they have a kind of "hook” which
fits perfectly over the wheel run flange. The use of a hammer – should have at
least 2 kg – makes life easier. Hammering on the side of the assembly levers
plus lifting them from time to time helps a lot.
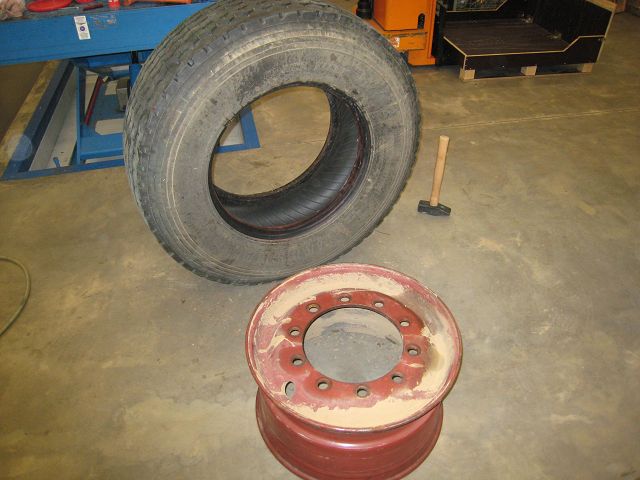
Sooner or later the rim
will fall out of the tyre.
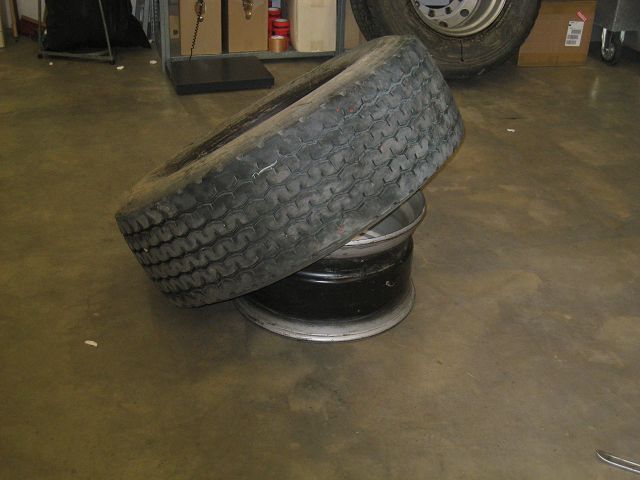
Put the tires on the
rims, in my case onto those already painted in silver. Again it is very
important that tyre and rim are well in-soaped in the crucial places. The part
of the rim with recess upward and then lay the tyre onto it.
Use the assembly lever
to lift the tyre bit by bit piece over the wheel run flange.
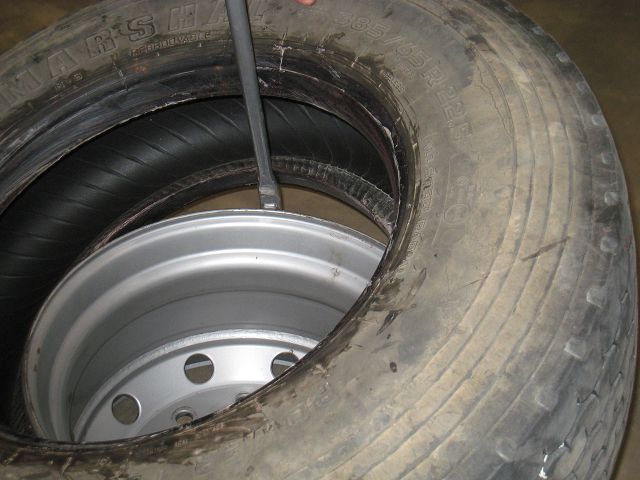
You feel like the King!
However still the last
part is missing. Oh, behind me is the pack of the trim-powder, you put it
including bag into the wheel, whilst driving the bag opens and the powder
distributes itself at those places, where normally trim-leads would have been
attached. Truck wheels are balanced normally always on their one and not on the
axle. So I hope that by using the trim powder (name should be something like
“Equal-XXXX” in English, just in case you want to ask you supplier for it) it is
as if the wheels were balanced "on the axle".
The only thing left is
getting the tyre again onto the rim, which is not so easy without a hose.
Professionals have kind of large sealing clip (would waste too much place in a
camper van) but I am still aware of two additional tricks:
The
bicycle hose trick:
I put the rim on a chunk, so that the tyre seals itself by the pure weight
pushing onto the lower side of the rim. Unfortunately there will always remain a
gap on the upper side and normally the compressor never has the capacity to
press the tyre by a sudden blow of air and to seal it again the upper part of
the rim - even if you leaves the valve out! The solution is using bicycle hose
(22" in my case) inflated softly with air and putting it into the gap. Now you
pressurize the wheel, whereby the bicycle hose is getting squeezed in. But
because everything is well greased you can pull it out easily even up to 1 bar.
A short video shows the procedure, just click here (size 4,10 MB, simply go with
the mouse over the link, click right "Save in directory" and then start the
video from your own hard disk):
VIDEO
The fire trick:
Brake cleaner burns
marvelously! Spray a lot into wheel and then lighten it, it makes "fump" and the
tyre is pushed onto the rim by the sudden increase of air internally. Note: I
tried it 4 times, until I had sprayed a sufficient quantity of brake cleaner.
Use a lot – for my feeling a lot at least. However for this job you should leave
the valve in, because otherwise the incineration gases escape immediately and
the tyre slides down – off the wheel run flange because of the soap used
previously to mount everything easily. In addition you should start immediately
with pressurizing the wheel. The incineration gases are cooling quickly by the
cold mass of steel and rubber, the pressure decreases and again the tyre slides
off the rim! What you don’t see here: After it had finally worked after the
fourth attempt I had exactly the problem which I had warned you about at the
very end before. So I used again to the bicycle hose trick! OK, who wants to
have a look how I using the fire trick, click here (size 1,08 MB, simply go with
the mouse over the link, click right "Save in directory" and then start the
video from your own hard disk): VIDEO
The hammer-trick:
Smash with a big hammer onto the tread section whilst you are already
pressurising the wheel. The smash will create for a short moment a higher
pressure, which will seal the tyre against the rim. NOTE: To support the
pressurising leave out the valve! And keep the wheel upright.
This worked nearly without any problems after the wheel stood nearly upright for
several days and the rim mounted half-way and pushing one side away from the
other (reason for that was that I had to wait for the delivery of a new valve).
This seemed to have widened the inner part of the tire.
The lashing
strap-trick
Sling a sufficient solid lashing strap (best a ratchet type) around the
tire and the squeezing of the tire should push the shoulders of the tyre to the
side of the rim.
Not yet tested, hint from Pirx.
Due to input of my
friend Stefan Sigl the installing soap can have disadvantages:
Driving in deep sand with low tyre pressue the installing soap can cause slip
between rim and tyre. As a result sand can get in and so the sealing will no
longer be 100% ...
As a result you need to take of the tyre and clean it and the rim.
Due to my experience the installation soap is a MUST, so it would be best to
clean everything BEFORE pressurizing. If then the trick with the bicyle hose
will work or it will get stuck between rim and tyre I cannot say at the moment.
Final mounting of the
wheels:
I have got
middel-centric rims, fixed by flat
collar nuts. As a result it is not that easy to assure that the rims are really
absolutely centric. The trick is not to fix the nuts immediately 100% after you
have lifted the wheel onto the wheel studs (pls. refer as well to dismateling
above, you can use the wheel cross as well for this job and even turn the wheel
if necessary, especially for the rear axle where the brake my be applied) but to
do it in a "cross mode". AND once you have finished the first turn with a very
low torque go for second complete turn with medium torque and than the final and
last one. This assure normally, that the wheel is really located centric.
The fixing of the wheels in normal "cross mode" applies for all wheel, even if
they are not middel-centirc.
The torque: You need anyhow a longer lever to achieve the required torque. So
why not make a marker in relation to you weight and the required torque onto it?
E. g. you need Newtonmeter = 600 Nm, your weight = 90 kg x 9,81 m/s²
(gerundet 10), as a result he marker should be at 600 / 900 = 0,66m. So if you
press with your 90 kg at round about 66 cm in such a way that your feet nearly
lift off you have applied 600 Nm onto the nuts.
The
data on the rims are as follows:
22,5x1175 IS 135
D/DOT GERMANY
160L
DAF 1247502
27798
(next line):9
857PCP
respectively.
Lemmerz
012102
1
78 and behind: /4
11,75x22,5
Due
to my measurements the rims in- /offset (depending which way round
you mount them) is 135 mm respectively –150 mm.
The method to determin the rims in-/offset (ET) requires two measurements and a short
calculation.
Put the rim flat on an even surface. if you leave the tyre on it may slightly
influence the result.
First you measure the distance from the surface to the contact face of the rim (the
one showing to the surface). This shall be "A". Now you turn the rim and
measure as before. The result shall be "B".
The calculation is ET = (B - A) / 2
The algebraic sign is depending how the rim is mounted: It is positiv if the the
wheel is going inside the chassis, it is negative if the wheel is gettting out
of the chassis.

 Besucher/Visitors
